Starting Strength Training After 40: What to Know First
If it has been years since you trained, you are the person a beginner plan is written for. Age changes the starting point and the pace. It does not change whether muscles respond to work.
Why it matters more now
Muscle is not permanent. Harvard Health reports that age-related muscle loss can begin at around 35 and runs at about 1% to 2% a year for the typical person, and that it can speed up after 60. The same report notes that strength training can help reverse those effects, and that people with stronger muscles are less likely to fall.
What the guidelines say
- All adults: muscle-strengthening activity on at least 2 days a week, plus 150 minutes of moderate aerobic activity.
- Adults 65 and older: the same, with activities that improve balance added.
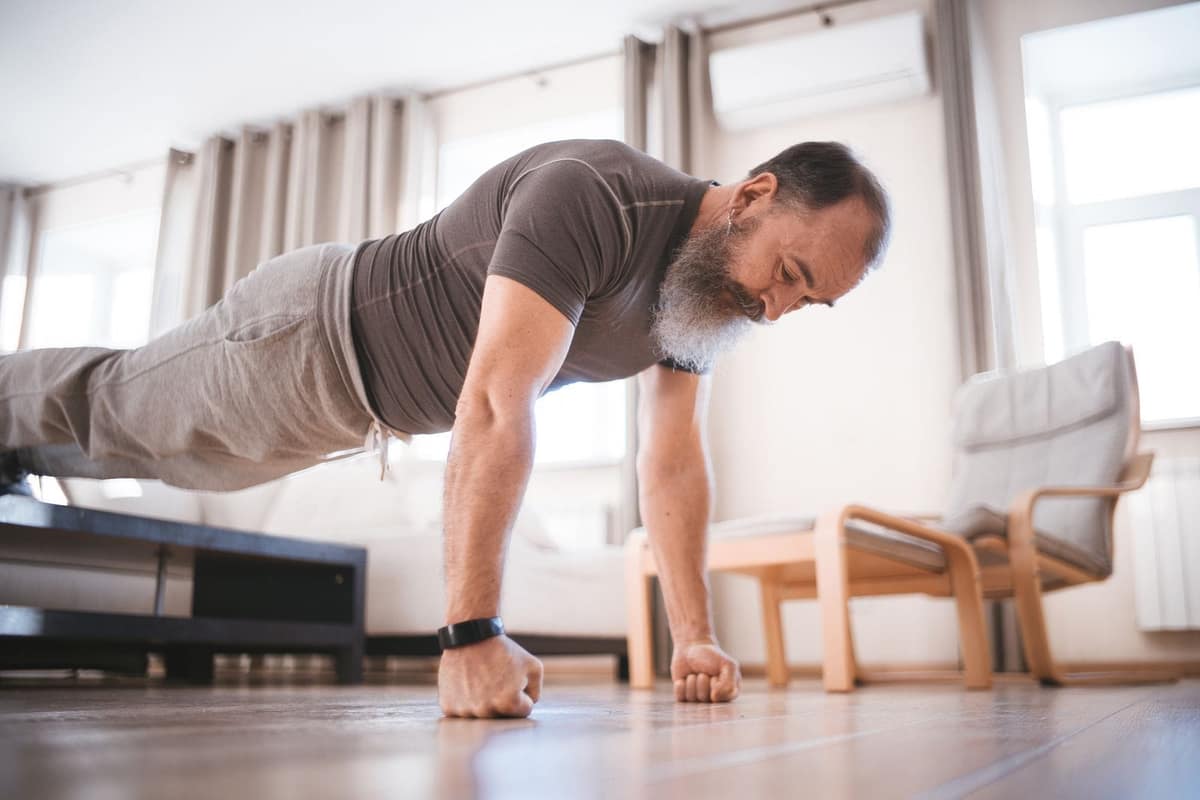
- Body weight counts. The CDC lists exercises that use your body weight for resistance, such as push-ups, as muscle-strengthening activity.
Before you start
Talk to your doctor first if you have a heart, blood pressure, joint or bone condition, an injury, or have been inactive for a long time. The CDC notes that people with chronic conditions may want to ask a health care professional what type and amount of activity is right for them.
How to start
- Use the easier versions. Incline push-ups on a countertop, squats to a chair. There is no prize for starting on the floor.
- Take the longer rests. If the plan says 30 to 45 seconds, take 45.
- Treat recovery days as training. Adaptation happens between sessions, and it can take a little longer than it did at 25.
- Warm up every time. Two minutes of easy movement before the first set.
- Progress one step at a time. A rep or two more, or one more round. Not both.
Three moves to start with
Incline Push-Up
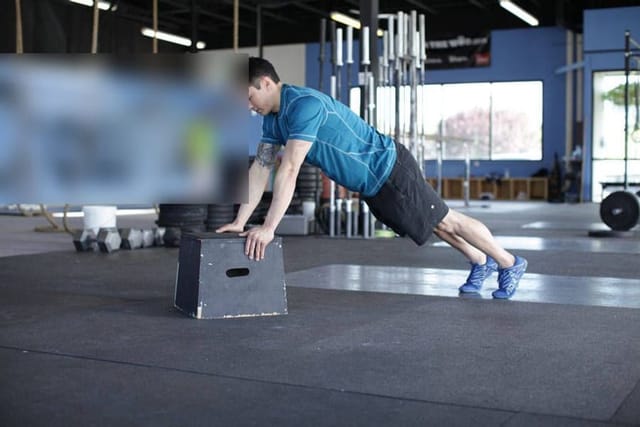
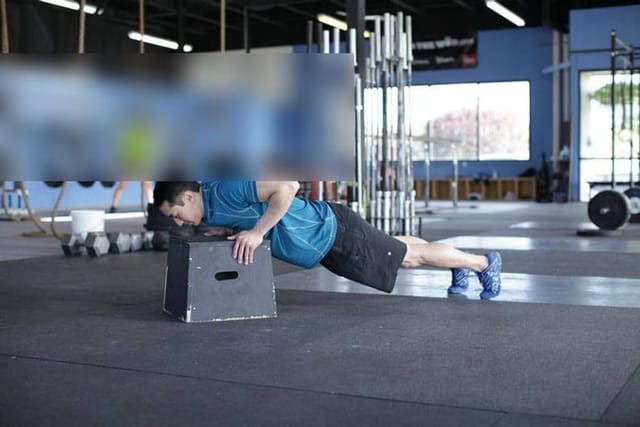
- Place your hands on a sturdy chair, bench or countertop, a little wider than your shoulders.
- Walk your feet back until your body is one straight line from head to heels.
- Bend your elbows and lower your chest toward the edge, elbows about 45° from your sides.
- Press back up until your arms are straight.
Form cue: Squeeze your glutes so your hips don’t sag.
Easier: Use a higher surface, such as a countertop or a wall.
Bodyweight Squat
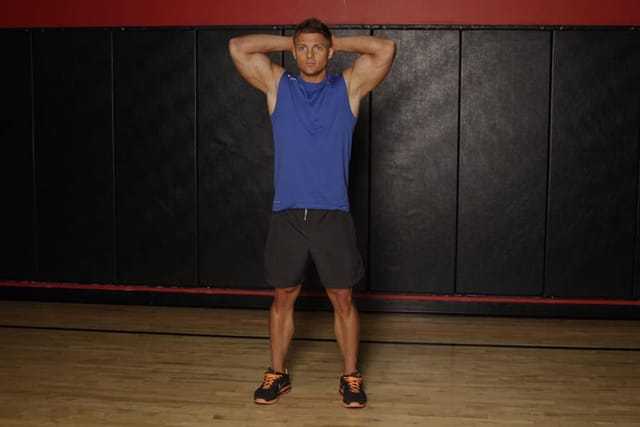
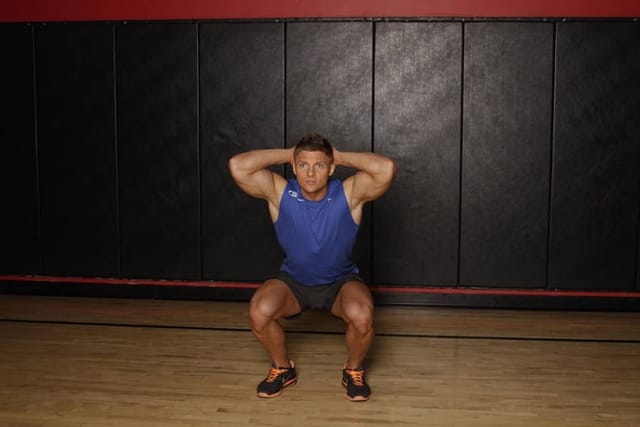
- Stand with your feet shoulder-width apart, toes turned slightly out.
- Push your hips back and bend your knees as if sitting into a chair.
- Go as low as you can while your heels stay down and your chest stays up.
- Drive through your whole foot to stand tall.
Form cue: Knees track over your toes; don’t let them cave in.
Easier: Squat down to a chair, touch it lightly and stand back up.
Glute Bridge
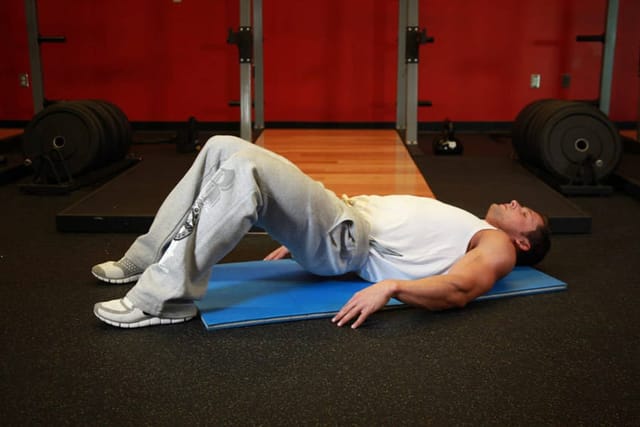
- Lie on your back with your knees bent and feet flat, hip-width apart.
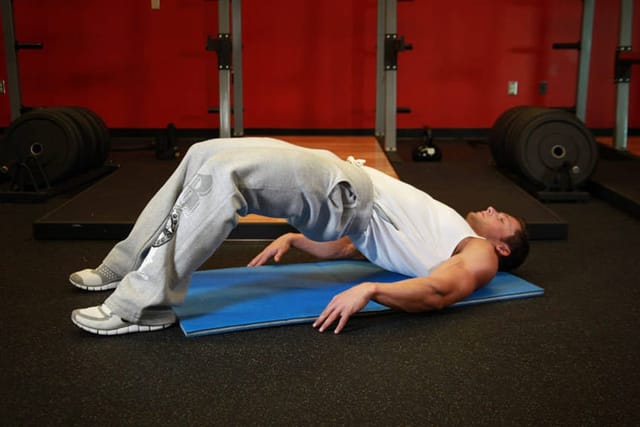
- Press through your heels and lift your hips until knees, hips and shoulders line up.
- Squeeze your glutes at the top for one second.
- Lower slowly to the floor.
Form cue: Lift with your glutes, not by arching your lower back.
Easier: Lift only as high as feels comfortable.
What to expect
Consistency beats intensity. The first changes most people notice are practical ones: stairs, getting up from the floor, carrying things. How fast that happens varies from person to person, and nobody can promise you a timeline.
Sources
- Harvard Health Publishing — Strength and Power Training for Older Adults
- CDC — Adult Activity: An Overview
- CDC — What Counts as Physical Activity for Older Adults
The CaliStart bundle is 84 days of sessions like this, from beginner to advanced, one page a day, with photos of every move. Seven PDFs, pay once.
General fitness information for healthy adults, not medical advice. Talk to your doctor before starting an exercise program, and stop if you feel pain, dizziness or chest discomfort. Results vary. The people in the photos are models.